
If you are starting a new WordPress blog then the first step of the process is to buy hosting and a domain name. Although this is a fairly straightforward process, if this is your first time purchasing hosting and a domain name, the sheer number of hosting companies, hosting plans, and the hosting terminology itself, can seem a little daunting.
Here at Themeisle, we recommend using Bluehost to host your WordPress website.
So, in this how-to guide, we will walk you through how to buy hosting and a domain name from Bluehost, explaining exactly what you need to do to get your hosting account set up.
Let’s get started!
Bluehost: An introduction

Bluehost is a popular hosting provider that offers an extensive selection of plans, features, and tools to help users host their websites with ease. Founded in 2003, Bluehost now powers over two million websites across the globe.
For beginning bloggers, we recommend the Basic or Choice Plus plans because they offer all the features you need for an affordable price:

How to buy hosting and a domain name from Bluehost
To buy hosting and a domain name from Bluehost, head to the Bluehost WordPress hosting page and click Select under the shared hosting plan you want to purchase:

Bluehost will now walk you through a series of steps that you will need to complete before you can make a purchase.
- Create a new domain
- Enter basic account information
- Choose billing cycle
- Select any package extras
- Enter your payment details
- Create a password
- Log into your new Bluehost hosting account
1. Create a new domain
The first step is to set up your domain name, which is your website’s permanent address on the Internet. For example, our domain name is themeisle.com. Start with sign up.
With Bluehost, you can either Create a New Domain or Use a Domain that you Own (which you have previously purchased from a third-party domain registrar).
Bluehost gives you a free domain name for your first year, so we’d always recommend using the Create a new domain option to take advantage of that freebie:

Choosing the right domain name for your new website isn’t easy. But don’t worry, we have written plenty on this subject to help you choose the perfect name…
- How to Choose a Domain Name: 4 Simple Steps
- Need a Blog Name Generator: 9 Best Tools Compared
- Domain Extensions: An Essential Guide – How to Choose One and Why
Once you have decided on a domain name, type it into the search function under Create a New Domain and select Next.

If your domain is not available, Bluehost will give a list of similar suggestions, or a selection of different domain extensions that you can use.

Either pick one of Bluehost’s suggestions, or search again using a different domain name.
2. Enter basic account information

Once you have settled on an appropriate domain name, the next step is to create an account with Bluehost. To do this you will need to fill in some personal information, including…
- Name
- Business Name (if appropriate)
- Address
- Phone Number
- Email Address
Alternatively, you can sign in with Google and allow Bluehost to access your details.
3. Choose billing cycle

Next, you can choose how long you want to purchase hosting for. Typically, you’ll pay lower monthly prices if you commit to a longer period. However, with Bluehost it’s a bit tricky and almost misleading. At first glance it appears that the lower monthly rate is actually for the shorter time commitment.
Take a look the prices for the Basic plan:
- 12 Months – $1.99 per month ($23.88 total)
- 36 Months – $2.99 per month ($107.64 total)
However, it’s important to keep in mind that the the above prices are discounted, and after the initial term, all plans renew at the regular rates. In a practical sense, what this means for you is that if you are 100% certain that you’re in it for the long haul, then the three year promo could still be a more attractive option.
Here’s why:
Although you’ll be paying almost twice the amount compared to the one year package during the first year, as soon as year two starts, it’ll be a whole different story. On the one year deal you’ll be bumped up to the normal rate, whereas on the three year package, you’ll be enjoying a monthly price of about 50% off for another two years. It’s something to take into consideration.
4. Select any package extras

Next, scroll down the page to Package Extras section. Here you will find a list of extra tools and services that you can purchase alongside your hosting plan. These include…
- Domain Privacy Protection ($11.88 a year) – This service hides your personal information in the WHOIS domain database, preventing it being available to the public. So if you want to keep your info private then this is good ‘extra’ to purchase.
- CodeGuard Basic ($35.88 a year) – CodeGuard takes automatic daily backups of your website and restores them in one simple click if needs be. (Alternatively, you can install the UpdraftPlus WordPress plugin if you would like a free backup tool).
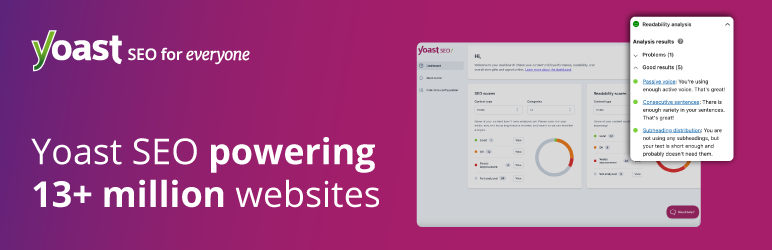
- Yoast SEO Premium ($23.88 a year) – This is a significant savings on what is an all-around excellent SEO tool and one that most WordPress users use (including the team here at Themeisle). With that said, the free version of Yoast (below) is enough to get you started.
- SiteLock Security ($35.88 a year) – Benefit from basic spam, malware, and blacklist scans, as well as a SiteLock verification certificate that will demonstrate to your customers that you are a reputable and trustworthy business. (Equally, there are numerous WordPress security plugins that you can use on your site – Wordfence being a powerful free option.
- Single Domain SSL ($39.96 a year) – This is a higher-level SSL than the free Let’s Encrypt SSL that you’ll get automatically with your package. There is a technical explanation behind this that involves validation levels, but in general, it’s not necessary for most beginner level bloggers.
With the potential exception of domain privacy, you shouldn’t feel compelled to purchase any of these extras. Your site will be totally fine without them and, as we explained above, you can find free WordPress plugins to fill the gaps.
5. Enter your payment details
The last step in the process is to enter your payment details.

Then, agree to the Bluehost terms and conditions and, if you are happy with all the above information that you have entered, click on Submit.

Bluehost will now process your payment.
6. Create a password
On the payment confirmation page, Bluehost will ask you to create a password. This will be the password you use to log into your Bluehost hosting account, so make sure it is either memorable or you have made a note of it. We’d recommend using a strong password and storing it in a password manager tool.

Bluehost will now set up your new hosting account.
7. Log into your new Bluehost hosting account
Once your new hosting account has been created, Bluehost will send you an email containing your login details. After receiving the email, open the Bluehost website and click on Login.

Now enter your login details.

Your new Bluehost dashboard will then open. It is here you can manage your account, create new websites, purchase new domains, browse other apps and services, and access your cPanel.

Have a browse of your new dashboard to help you become acquainted with its layout and features. If you have any questions, or would like some help with getting started, simply click on the question mark icon in the top right-hand corner of the dashboard. Bluehost provides an extensive knowledge base packed full of in-depth guides, how-to articles, and a whole Getting Started section, as well as live chat and phone support.
You can also follow our guide to install WordPress on your new hosting.
Final thoughts on how to buy hosting and a domain name from Bluehost 🧐
If you are looking to buy hosting and a domain name, then Bluehost is a great option. Extremely affordable, user-friendly, and offering a wide range of features and functionality, Bluehost enables you to quickly and easily sign up for one of their many hosting plans and create a new account.
👉 So where do you go from here? Well, we have plenty of guides to help you with the next steps in the process:
Any questions on how to buy hosting and a domain name with Bluehost? If so, please ask away in the comments below…


Or start the conversation in our Facebook group for WordPress professionals. Find answers, share tips, and get help from other WordPress experts. Join now (it’s free)!